|
My photo gallery
This is updated on a continual basis.
Please don't judge me for the jumbled manner in which these pics have been assembled.
I am just getting them posted then later I will organize. The first 2 pics are my wife(priorities first). Then comes the car. :o) The engine info starts over here---------------------------------------------------------------------------------------------------------------------------------->
|
|
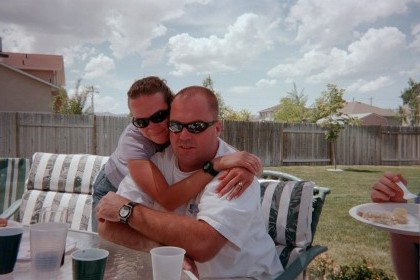
We are just adorable aren't we?
|
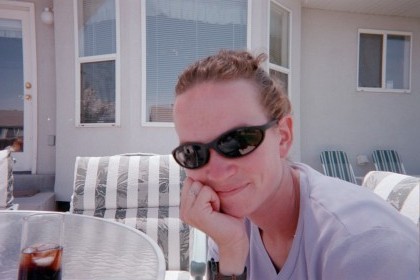
Hey Babe!!
|
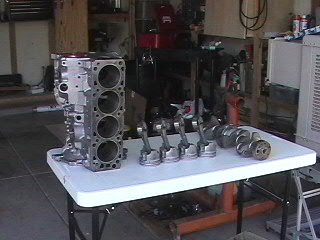
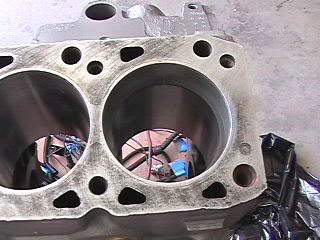
This is the 2.3L disassembled block, pistons & crankshaft
Just got them back from the machine shop.
|
|
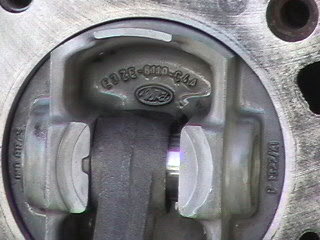
I was able to reuse the original pistons. They look great and are the original Ford with standard bore.
|
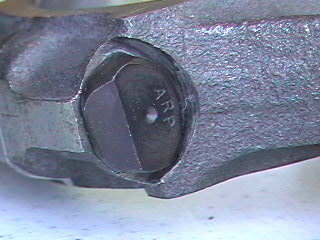
The OEM rodbolts were upgraded to ARP. The rods were then recondition/resized.
|
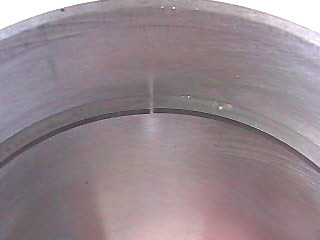
If you look close you can see the top ring placed in the cylinder for sizing.
|
|
This is the ring end gap. Totalseal's spec is a maximum of .022in.
|
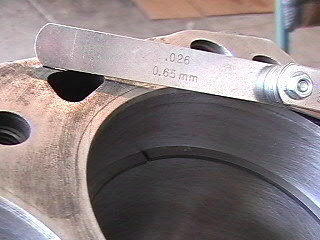
Even though my bore is standard at 3.780, the ring gap showed a little large at .026in.
A talk with Totalseal's techs eased concern when we agreed the slightly larger ring gap is fine if not better for a high boost turbo application.
|
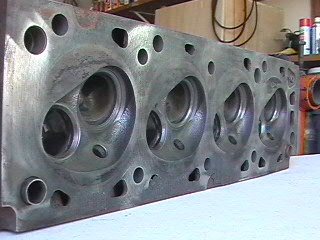
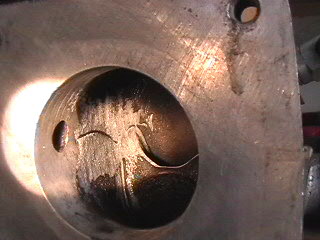
At this point the cylinder head is untouched by me. Only things done to it thus far are magnaflux to reveal any cracks and...........
|
|
.......the very first attempt at porting. This was done before I got the head. Its a good starting point. (Thanks Mark)
|
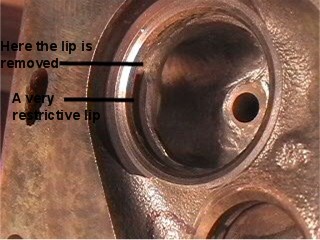
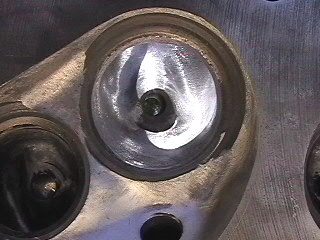
There is a pretty noticeable lip just above the intake valve. Common sense says its pretty restrictive.
This ended up being a pretty wasted step since I ended up getting the head cut for the big valve. Oh well, live and learn.
|
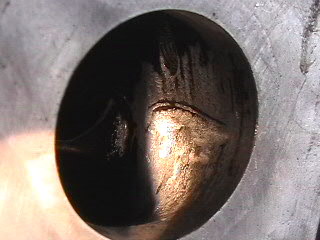
Intake port. About 80% complete.
|
|
Exhaust port 80% complete.
|
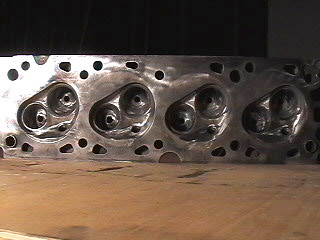
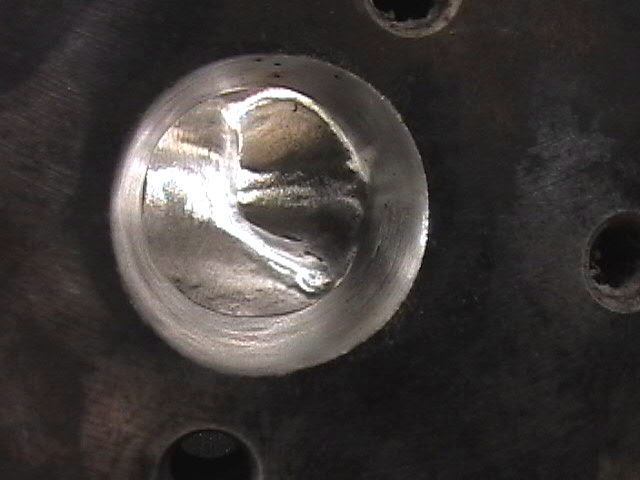
Here is the head after about 8 hours of porting & polishing.
|

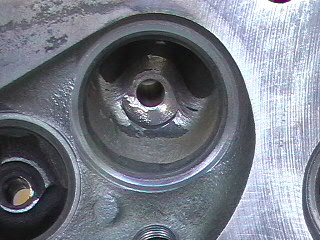
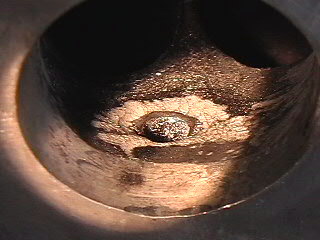
Combustion chamber 90% complete.
|
|
After recommendation from fellow 2.3 enthusiasts, I opened up the combustion chamber by "laying back" The wall adjacent to the exhaust valve.
|
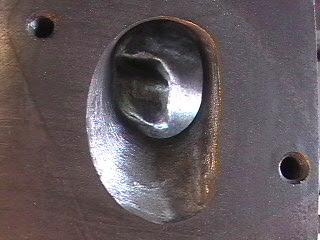
Intake bowl
|

Exhaust bowl
|
|
Oh my achin eyeball. Do NOT do any porting unless you have a good quality pair of safety goggles.
Regular safety glasses won't work.
Ask my eye doctor and me how I know.
hahaha, what a gross picture.
|
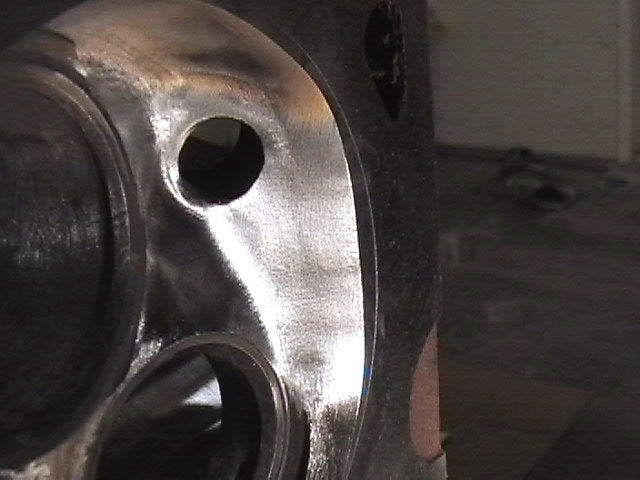
The upper intake is not hogged out like alot of 2.3's. I just smoothed out some of the rough spots. There were some pretty nasty spots of casting flash.
|
On the other side there were some huge bumps created by the mounting holes for the throttle linkage. Its flat now.
|
|
The fitting on the underside of the upper intake to the pcv had to be ground down as well. It protruded about 1/4 inch into the intake.
|
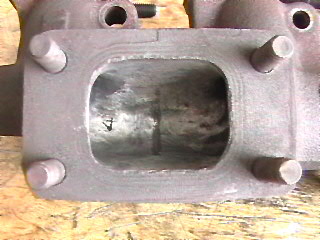
The stock E6 exhaust manifold is port matched to the turbo flange gasket. I smoothed out as far into the manifold as I could reach with my die grinder and a 6" extension.
|
There has been so much debate out there among 2.3 enthusiasts about headers vs. ported manifolds. I have elected to stay with the ported manifold until someone can prove a header is best. Besides, the manifold is free unlike the tab for a header.
|
|
I took as much off as I dared on the corners to cylinders 3 & 4. Smoothing out flow to the turbo.
|

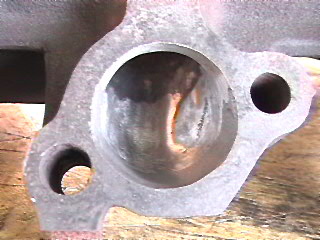
Ported E6.
|
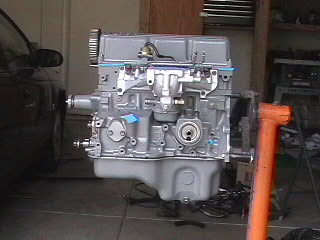
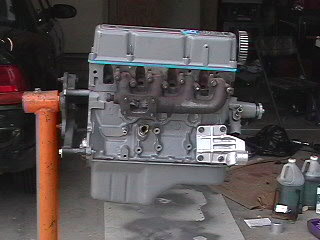
Here is a mostly assembled beauty. Isn't she cute? I ended up incorporating ford blue into the engine/compartment because of the blue v/c gasket. It looks good and will be easier than hiding the gasket.
|
|
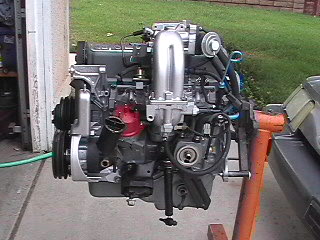
The right side of the engine. I didn't notice until the picture was taken that I don't like how the exhaust manifold looked.
|
Here it is with everything reassembled. The only 2 things left to do before the motor goes in are clutch and a special order turbo gasket. Don't worry, the red distributor cap will get traded out for a grey one. Gotta keep with the color scheme.
|
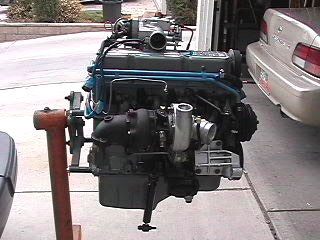
I ended up painting the exhaust manifold and turbo an ultra hight temp jet black. I think it turned out pretty good. Also notice the blue I chose for the coolant plumbing. I think it turned out good.
|
